This post explains how to create a Python project in Eclipse, using plugin PyDev.
It assumes you have followed already the installation and configuration steps for Python on Eclipse on the relevant posts, either on Windows 10/11 or Ubuntu.
Step-by-step procedure to create a Python project in Eclipse
1. Run Eclipse
Open Eclipse on you operating system.
2. Switch to Python perspective
As Eclipse does not have Python integrated as default, the perspective will be other than it. For example, if you followed the installation instructions on this post, default perspective will be Java.
To change perspective to Python, locate the “Add perspective” button on the top right corner. The “Add perspective” icon may be located between the magnifying glass and Java perspective icons.
Note: this menu may be collapsed on the left, and you need to click on “Maximize” before locating it as described above.
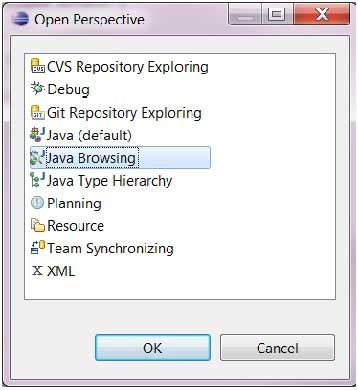
In the “Open perspective” dialog, select the “PyDev” perspective and click “Open” button.
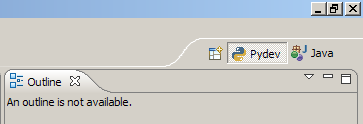
Python perspective button, recognizable because of the Python icon, will be added to the list. You can switch from this perspective to another (Java, for instance) when you consider.
3. Create Python project
Once you are in the main screen of Eclipse, go to menu bar > “File” > “New” > “PyDev Project”.
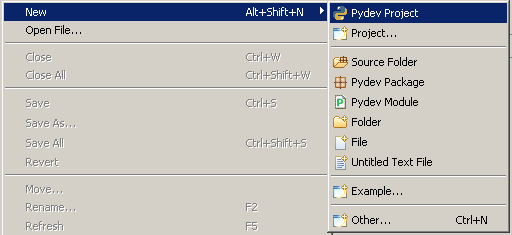
Because we enabled the PyDev perspective, PyDev project is proposed by default.
Enter “HelloWorldPython” in “Project name” textbox.
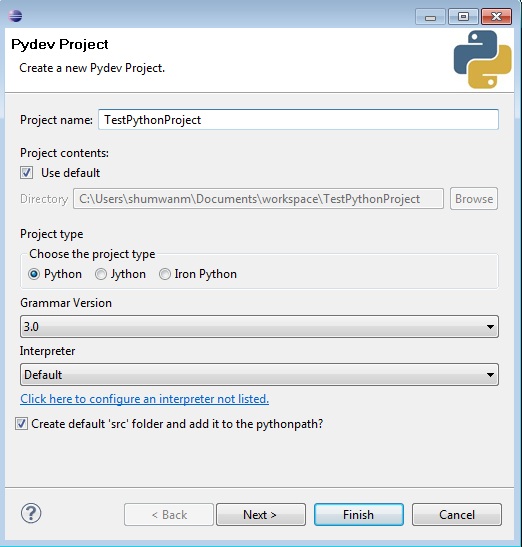
Click on “Finish”
You will find the new project structure in PyDev Package Explorer on the left of Eclipse main screen.
4. Create module
On Eclipse main screen, go to menu bar > File > New > PyDev Module.
Enter “HelloWorld” in textbox “Name”.
You may find two pop-ups:
- Default Eclipse preferences for PyDev dialog. I just accepted the three of them.
- Template dialog. You can select “<Empty>” and click “OK”.
5. Write program
Overwrite code in “HelloWorld.py” with this code:
print("Hello world!")
When finished, go to menu bar > File > Save.
6. Run program
While in Eclipse main screen, locate the “Run as…” icon on the tool bar. Click it.
The “Run as” dialog will be opened. There are two options: “Python run” and “Python unit-test”. Choose the former and click “OK”.
Console will be opened at the bottom of the screen. It will display the text “Hello world!”.
Congratulations! You have created and run your first Python project in Eclipse.
You might be also interested in…
External references
- “How to configure Eclipse for Python“; Rose-Hulman Institute of Technology – Computer Science & Software Engineering