This post is about how to convert a computer with vanilla Ubuntu OS installed into a FOSS DAW. The steps will be quite similar for other GNU/Linux distributions, but extra steps may be needed, for example, to allow JACK working on real-time. Ubuntu 21.10 is the version tested.
Digital Audio Workstation (DAW) is a device or software that allows to edit audio inputs. It is a mandatory component in any music studio, either professional or amateur.
FOSS is an acronym meaning “free and open-source software”.
When “FOSS DAW” is said in this post, it means that we are configuring a DAW where all components are free and open-source, including the operating system.
Nevertheless, any hardware involved (like audio devices, cables, microphones, instruments or the computer itself) may imply costs, so do not take the word “free” too strictly.
We specify “standard Ubuntu” in the post title referring to the Ubuntu OS and to differentiate it from other Ubuntu distributions or “flavours” (like Xubuntu, Kubuntu, Lubuntu, Ubuntu Studio, etc.). This standard Ubuntu can be also colloquially called “vanilla”.
IMPORTANT NOTE: When I started to write post I have never heard of Ubuntu Studio, that is a Ubuntu flavour aimed on multimedia production (grouping audio, video and graphics) and different to standard Ubuntu. This tutorial is considering a vanilla Ubuntu distribution, but your life would probably much easier using Ubuntu Studio, so you would better try this distribution instead. Ubuntu Studio includes Ubuntu Studio Controls that ease configuration very much. I have not (yet) my own post explaining how to set up Ubuntu Studio for audio recording, but there are plenty of instructions out there.
In any case, I think it is still interesting this posts because it details how Linux or Ubuntu works regarding sound configuration, and also there will be still users that want to set up the vanilla Ubuntu or other Linux OS anyway. One of the possible reasons would be to avoid having too many OS installed in the same computer.
What do I need to convert my computer into a DAW?
The minimum software components you need in your computer to convert it into a DAW:
- A software DAW to be installed in your OS (in this case, Ubuntu). In this post we use Ardour app, but there are many other free and commercial software DAW solutions.
- In addition to that, you need to apply the proper configuration to your OS (in this case, Ubuntu)
A DAW needs sounds as an input. This input can have different audio sources:minimum components
- Audio files that registered sounds
- Stream live sound, generated by devices connected to your computer
The electric sound signal that comes into our computer can have two origins:
- An instrument, meaning anything that is able to generate a sound, and convert it directly into electric signal. It could be an electronic keyboard or electroacoustic guitar.
- A microphone that records analog sounds and converts them into an electric signal
If we want to register an external sound in our computer, we need to transform this analog electric signal into digital. We do this by using conversion cable that takes the signal from an XLR (standard microphone output) or jack 1/4″ / 3.5mm (standard guitar output) a brings it to an audio interface, for example.
Your Ubuntu OS needs to have:
- A sound server. Sound servers provide an API that allows apps to connect apps to our sound drivers and adds additional features. We are using JACK on this post.
- An audio plugin host. We need an application to coordinate all the audio plugins or sound streams into the DAW. In this post, we are using the app Carla.
Some useful additional applications that can be handy to us when working with music:
- A hard disk recorder (HDR), that is a software that converts the audio signal into a file. Ardour app will also make this work for us.
- A virtual amplifier that modulates the live sound coming into your computer. We will use Guitarix app in this post. Of course, it can be substituted by (or complemented with) a real amplifier.
- A virtual beat-box that generates rhythms that play along the melody. We are proposing to use Hydrogen. Again, we could also use a unique or complementary real beat-box or percussion.
All the apps proposed here are FOSS.
What I need to know about Ubuntu sound system?
ALSA (Advanced Linux Sound Architecture) is a software framework that comes inside the Linux kernel and provides an API for a sound card device drivers.
JACK (from the recursive acronym for JACK Audio Connection Kit) is a professional sound server API and pair of daemon implementations to provide real-time, low-latency connections for both audio and MIDI data between applications. It is available for different OS.
Our applications will need to interact with these components.
It is recommendable that you understand what are ALSA and JACK, in order to understand what you are doing and troubleshooting. I explained in this post the differences between a sound system (like ALSA) and a sounder server (like JACK).
Installing DAW Applications in Ubuntu
This post assumes that you know how to use a terminal and the Ubuntu Software Center.
Installing Ardour
Ardour is a multichannel hard disk recorder (HDR) and digital audio workstation (DAW). It can be used to control, record, edit and run complex audio settings.
In this post, Ardour is going to be both the DAW and HDR.
To install it from a terminal, type:
sudo apt-get install ardour
Alternatively, you can search it in Ubuntu Software Center.
Installing Guitarix (and JACK)
In this post, Guitarix is going to be our virtual amplifier.
To install it from a terminal, type:
sudo apt-get install guitarix
You may get a confirmation screen warning about the effect on the system of real-time for JACK (jackd2), that you need to confirm to finish installation.
Installing Guitarix will also install JACK, whose packet name is jackd2. The GUI of JACK is the app QJackCtl.
Alternatively, you can search Guitarix in the Ubuntu Software Center.
Note: Ubuntu Software Center labels it as proprietary while Wikipedia says it has a GPL license. Who is right here? In any case, it is free.
Installing Hydrogen
In this post, Hydrogen is going to be our virtual beat-box to synthesize drums and percussion.
To install it from a terminal, type:
sudo apt-get install hydrogen
Alternatively, you can search it in Ubuntu Software Center.
Installing Carla
Carla is an audio plugin host that we will use to redirect the sound input from Guitarix or Hydrogen into Ardour.
To install it from a terminal, type:
sudo apt-get install carla
Alternatively, you can search it in Ubuntu Software Center.
Connecting audio devices to your computer with Ubuntu
Your computer with Ubuntu will have most probably USB-A or USB-C ports, but not Jack nor XLR input. So the sound must be transported via a male USB at some point.
Instruments, microphones or any other input devices usually has jack or XLR outputs and not USB; in these cases, we need a connector that convert these formats into USB.
Most usually, instruments (like electric guitars, keyboards, etc.) use jacks while microphones use XLR and keyboards use MIDI. However, some instruments may be also compatible with the other connector.
You may use an audio interface to receive the jack, XLR or MIDI input and then connect it to the computer via USB.
Configuring standard Ubuntu to convert it into a FOSS DAW
Follow these steps to configure vanilla Ubuntu and convert it into a FOSS DAW.
Add user to audio group
In order to make use of real-time (RT) Linux functionality in Ubuntu, the user must be included in group “audio”.
This is already done by default in some OS, as for example Ubuntu Studio. But you need to do this manually on Ubuntu.
To check whether your user is included in audio group, open a terminal and type:
groups
Then, the list of groups to which current users belong is displayed. Lookp for “audio” group.
If “audio” group is missing, you must add this user manually to this group.
To add current user to “audio” group, type this command in the terminal:
sudo adduser $USER audioRun JACK / QJackCtl
QJackCtl is an app that can be used to control JACK audio server.
Click on Ubuntu launcher and type qjackctl. Click on the jack plug icon to open the app.
The JACK desktop application will be opened and JACK daemon will run in the background.

You may want to activate the PulseAudio bridge to allow not-JACK-aware application (like web browsers or media players) to be able to produce sound while JACK is started.
Click “Start” button to start JACK daemon.
If you are using Ubuntu Studio, you may use Ubuntu Studio Controls to check that JACK is running.
Run Guitarix
Click on launcher and type “guitarix”. Click on the icon.
If you forgot to open JACK, it will propose you to open it.

You make get an error that says “PitchTracker *** error creating realtime thread – tuner not started“. If this is the case, you must check the step “Add user to audio group”. Then log in and log out again. This solved the issue on some users. More info about this error on this link.
If that did not work, you may try to go to a terminal and type:
sudo dpkg-reconfigure jackd2
Select “yes” when it asks you to enable realtime process priority. Then reboot. This solved my issue. More info about this solution on this link.
There is a topic in Reddit called “r/Guitarix“. You may find support on these threads.
Run Hydrogen
Instructions here apply to Hydrogren version 1.1.0.
Go to launch and type “hydrogen”. Click on the H2 icon.
You can check the audio system used by going to menu bar > Preferences > “Audio System” tab > “Audio system” dropdown list.
Even when “Auto” is selected, there is a label that confirms what is the audio system automatically selected. It may be ALSA or JACK.
In order to synchronize Hydrogen and Ardour with Hydrogen, you need to set the latter as the time master.
To set Hydrogen as time master, go to:
Main screen > Toggle button “JACK Timebase master on/off” (J. Master)
If you do not set Hydrogen as time master, it would be desynchronized as seen on this video tutorial.
Run Ardour
Instructions here apply to Ardour version 6.9.0. I am aware that configuration options were slightly different in previous versions.
Go to launch and type “ardour”. Click on the icon.
On the Ardour initial screen, click on “New session”.
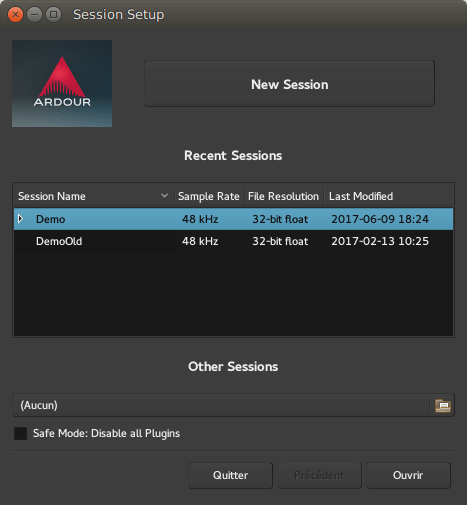
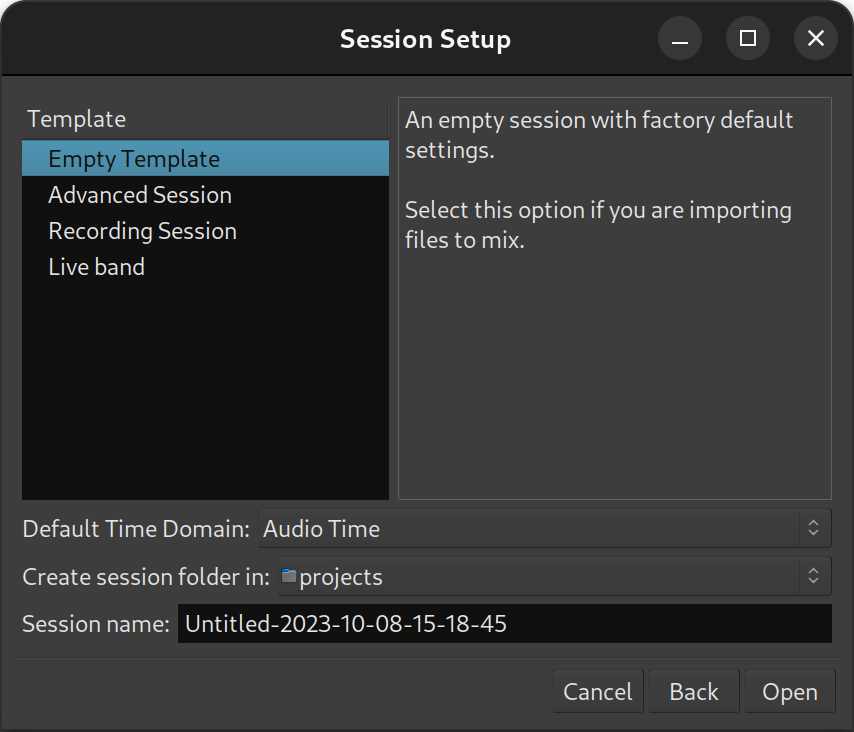
On “Session Setup” screen, choose “Empty template” and click “Open”.
“Audio/MIDI Setup” dialog may pop automatically. If it did not, go to menu bar > “Window” > “Audio/MIDI Setup”.
On “Audio/MIDI Setup” screen, find the “Audio system” dropdown list and select “JACK” (default is “ALSA”). This will make visible Ardour to Carla app. Click on “Start”.
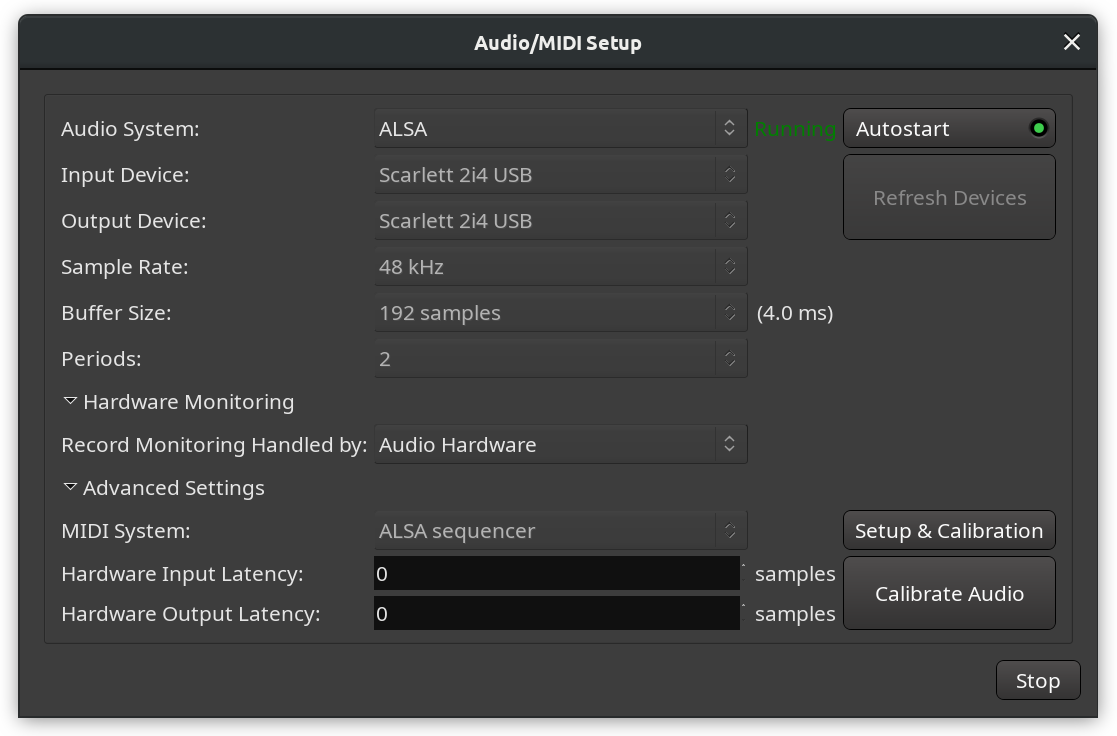
If you get at this point an error pop-up with the text “Failed to open audio devices” it is probably because JACK is not running. If this is the case, run QJackCtl as explained before. More info about this error on this link.
If you get an error pop-up with the text:
Could not create session in "/home/username/Untitled-2021-12-11-11-22-20"
---ERROR: JACK: Cannot create thread res = 1
ERROR: JACK: JackClient::AcquireSelfRealTime error
ERROR: JACK: Cannot use real-time scheduling (RR/5) (1: Operation not permitted)
ERROR: AlsaAudioBackend: failed to allocate parameters.
ERROR: AlsaAudioBackend: failed to allocate parameters.
You can troubleshoot this issue in the same way than the Guitarrix “real-time thread” error, so please review the notes in that step for more details. The summarized instructions were first, try to follow the instructions in “Add user to audio group”, and if it did not worked, reconfigure JACK ensuring that real-time is enabled.
This issue is discussed on this external link.
You need to set transport option to “JACK” in Ardour app.
To set transport to JACK in Ardour, follow these steps:
Main screen > Menu bar > “Edit” > “Preferences” >> “Transport” > “Chase” > Button “Show transport master window”
Default radio button value is “MIDI Clock”. Select “JACK” instead. Close the dialog.
Back in the main screen, click on the button on the top left and 2nd row to change its value from “Int.” (internal) to “JACK”.
Without this last change, Ardour may not record input and Hydrogen would sound as a noise.
The following configuration steps for Ardour are required only if you plan to synchronize Ardour with Hydrogen, and they are:
- Change value from “internal” to “JACK” in main screen
- Set Ardour as a time salve of Hydrogen
To set Ardour as a time slave of Hydrogen (required to synchronize Ardour and Hydrogen), follow these steps:
Main screen > Menu bar > “Session” > “Properties” >> Uncheck “Ardour is the JACK Time Master (provides Bar|Beat|Tick and other information to JACK)”
Close the “Session properties” dialog.
The details about how to synchronize Hydrogen and Ardour are detailed in this post and video tutorial.
Connect audio interface and set up JACK
Go to QjackCtl main screen and click on “Setup…” button (on the right).
In the “Settings” tab > “Parameters” tab (the one display as default) pay attention to the values available on “Interface” dropdown list. Before connecting an audio interface, the available values are hw:PCH “HDA Intel PCA” and hw:PCH1 “Analog”.
I tested to connect two audio interfaces:
- Behringer Guitar-to-USB
- Behringer UMC204HD
My instrument (e.g., a guitar) has a jack 1/4″ output. I connected a Behringer Guitar-to-USB cable (male jack 1/4″ to male USB-A) and then connected it to my computer.
If I check the “Interface” dropdown list after connecting it, there are two new values in the list: hw:Device (USB PnP Sound Device) and hw:Device,0 (USB Audio). I had to select the second one manually, otherwise it did not work fine.
When I connect an audio interface Behringer UMC204HD, then there are two new values: hw:U192k (UMC204HD 192k) and hw:U192k,0 (USB Audio).
Run Carla
Carla allows to monitor and modify the different inputs and outputs between the audio applications using the sound server of our system.
To start Carla, go to launch and type “carla”. Click on the Carla icon.
![]()
As default, Carla works with JACK sound server, though other APIs are supported. Because we are using JACK on this post, no changes are needed.
Go to tab “Patchbay”. It displays only the apps using the sound server that has been configured, that in this case is JACK.
In this post, I am representing inputs and outputs in this way, imitating how Carla does:
- < output
- input >
Take some time to understand what means each component on Carla screen.
Here I try to summarize the components and inputs/outputs I have, and for those that are bold, what they are.
- Computer external input (internally, it is considered an output)
- system
- < capture_1: computer internal microphone, left stereo channel
- < capture_2: computer internal microphone, right stereo channel
- system
- Guitarix app
- gx_head_amp
- in_0 >:
- midi_in_1 >:
- < out_1:
- < midi_out_1:
- gx_head_fx
- < in_0:
- out_0 >:
- out_1 >:
- gx_head_amp
- Hydrogen app
- Hydrogen
- out_L >: sound output from Hydrogen, left stereo channel
- out_R >: sound input from Hydrogen, right stereo channel
- Hydrogen
- Ardour app
- Ardour
- physical_audio_input_monitor_enable >: by default, it is connected to system:capture_1 and system:capture_2.
- LTC in >: It must be realted to the Linear Timecode, that I don really understand yet what it is about.
- Master audio/audio_in [1/2] >: It represents the general master input. 1/2 refers to left/right.
- Audio [1/2/3…]/audio_in [1/2] >: There are as many as tracks in Ardour open session, and they only appear once they are added to Ardour session. If audio tracks are configured “mono” while being added, there will be a single input in Carla (audio_in 1). It seems that odd numbers are automatically connected to system:capture_1 and even to system:capture_2.
- physical_midi_input_monitor_device >
- MTC in >
- MIDI Clock in >
- < LTC-Out: same as LTC in but out. Disconnected.
- < Click/audio_out [1/2]: It is automatically connected to system:playback_[1/2]
- < Master/audio_out [1/2]: It is automatically connected to system:playback_[1/2]
- < auditioner/audio_out [1/2]: It is automatically connected to system:playback_[1/2]
- < Audio [1/2/3…]/audio_out [1/2]: There is one for each track in Ardour session. In this case there is audio_out 1 and 2, for each stereo channel. It is automatically connected to ardour:Master/audio_in [1/2] (to its corresponding stereo channel)
- < MMC out
- < Scene out
- < x-virtual-keyboard
- < MTC-out
- < Midi-clock-out
- Ardour
- Computer external output (internally, it is considered an input)
- system
- < playback_1
- < playback_2
- system
You can connect components by dragging and dropping lines from one component to another.
Disconnect components by right-clicking on the source or destination and select “Disconnect”.
The modifications I had to do was:
- Connect the 2 stereo channel Hydrogen output to two different track inputs in Ardour.
Ensure that components are connected in this way:
- Computer sound input is connected to Guitarix input
- Guitarix and Hydrogen are connected to Ardour and computer output (if you want to hear it why using it)
- All Ardour outputs in blue are connected to computer sound output
- Those inputs with a number (e.g., 1) are connected to output with the same number (e.g., 1).
- LTC-Out is not connected to anything.
Note: your instrument must be connected to your computer input.
You may be also interested in…
External references
- “Connecting instruments and virtual amps to Ardour in Ubuntu studio“; Rowland Gerlach
- Article “Advanced Linux Sound Architecture” ; Wikipedia
- Article “JACK Audio Connection Kit“; Wikipedia
- “How do I configure my linux system to allow JACK to use realtime scheduling?“; JACK
- Post “Connect and synchronize Hydrogen and Ardour“
- Video “Syncing Ardour and Hydrogen together“; bcacciaaudio
- Discussion “Guitarix error failed to lock memory“
- Video “[Guitarix] – Setup stand-alone for jamming with backing tracks off of YouTube“; bcacciaaudio
- Video “Guitarix Ardour and Jack for beginners – tutorial“; autoandimat
[…] How to convert a standard Ubuntu computer into an audio Studio […]