A class file contains Java bytecode, it means, the code of a Java application that can be executed by a Java Virtual Machine (JVM). Class files have a .class extension, and are generated from source code files from Java files, with .java extension, using a compiler.
As Java has different versions, so class files do. When the compiler generates the Java bytecode, it can make it according to different Java versions.
This post explains how to change the version of the class file of a Java program.
Why would I need to change the Java Class File Version?
It may be logical to think that the best practice is always to use the latest available version of the Java compiler. However, if we take into account compatibility, this is not always recommendable.
Java applications need a JDK/JRE to be run. The JRE should support the version of the class files in order to run them. if the compiler version is newer than the virtual machine version, system will trigger an error when trying to run it. So we may want to decrease the class file versions generated by our compiler to ensure compatibility.
In my case, I have installed the latest JDK on a MacOS X computer and the latest JRE in other different Windows. To my surprise, when generating a Java application from the first and trying to execute it on the latter there were version incompatibilities, even when both were in their latest versions.
I got this error when double-clicking the JAR file:
Error: A JNI error has occurred, please check your installation and try again
When I ran the same JAR file using Windows Command Prompt, I got this error:
Error: A JNI error has occurred, please check your installation and try again

Exception in thread "main" java.lang.UnsupportedClassVersionError: package/path/ProjectName has been compiled by a more recent version of the Java Runtime (class file version 57.0), this version of the Java Runtime only recognizes class file versions up to 52.0
As a conclusion, it happend that I generated an application in Java 13 and the destination JRE was running Java 8.
As a software developer, I expect that my product is compatible on most computers without configuration changes. I consider more logical to change the class file version (even when it implies not using the latest) rather than expecting all users to update their JDK or JRE’s and modify their configuration just to make run my application.
Correspondence between JDK and class file version
I had the clue that most computers were expecting class file version 52.0, but I was unsure what was the corresponding JDK version that should run the binaries. I had to make trial and error until I found the correspondence below.
JDK version / Class File Version
8 / 52
9 / 53
10 / 54
11 / 55
12 / 56
13 / 57
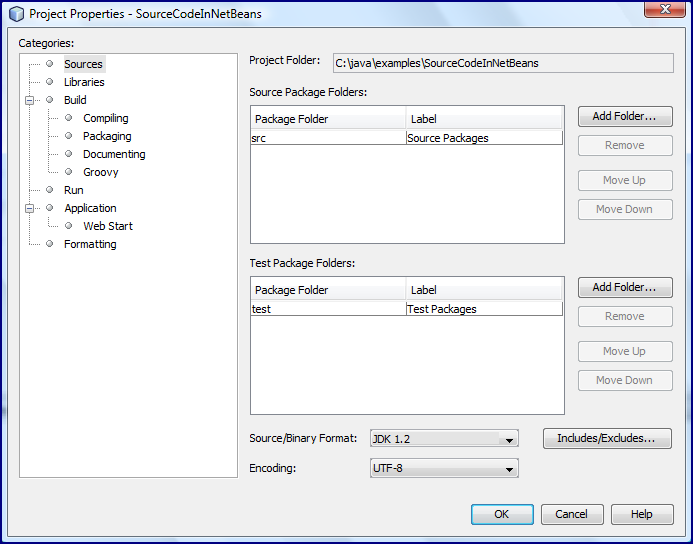
How to change compiler Version for a Project on NetBeans
You can modify the compiler version for a single project on NetBeans.
Right-click on project, go to Properties.
Go to “Sources”, then find the “Sources/Binary Format” drop-down list and choose the corresponding JDK version.
You might also be interested in…
External references
- Anshul Aggarwal; “Java Class File“; Geeks for Geeks
[…] How to change the Class File Version of a Java Application […]